Building a Self-Serve Bagging Station at Your Checkout
Summer traffic can turn a smooth checkout into a bottleneck fast. When the line backs up, the slowest part is often bagging, not ringing. A well-planned bagging station fixes that by putting the right bags within arm's reach and, in many stores, letting customers help pack their own purchases.
Why a Dedicated Bagging Station Pays Off
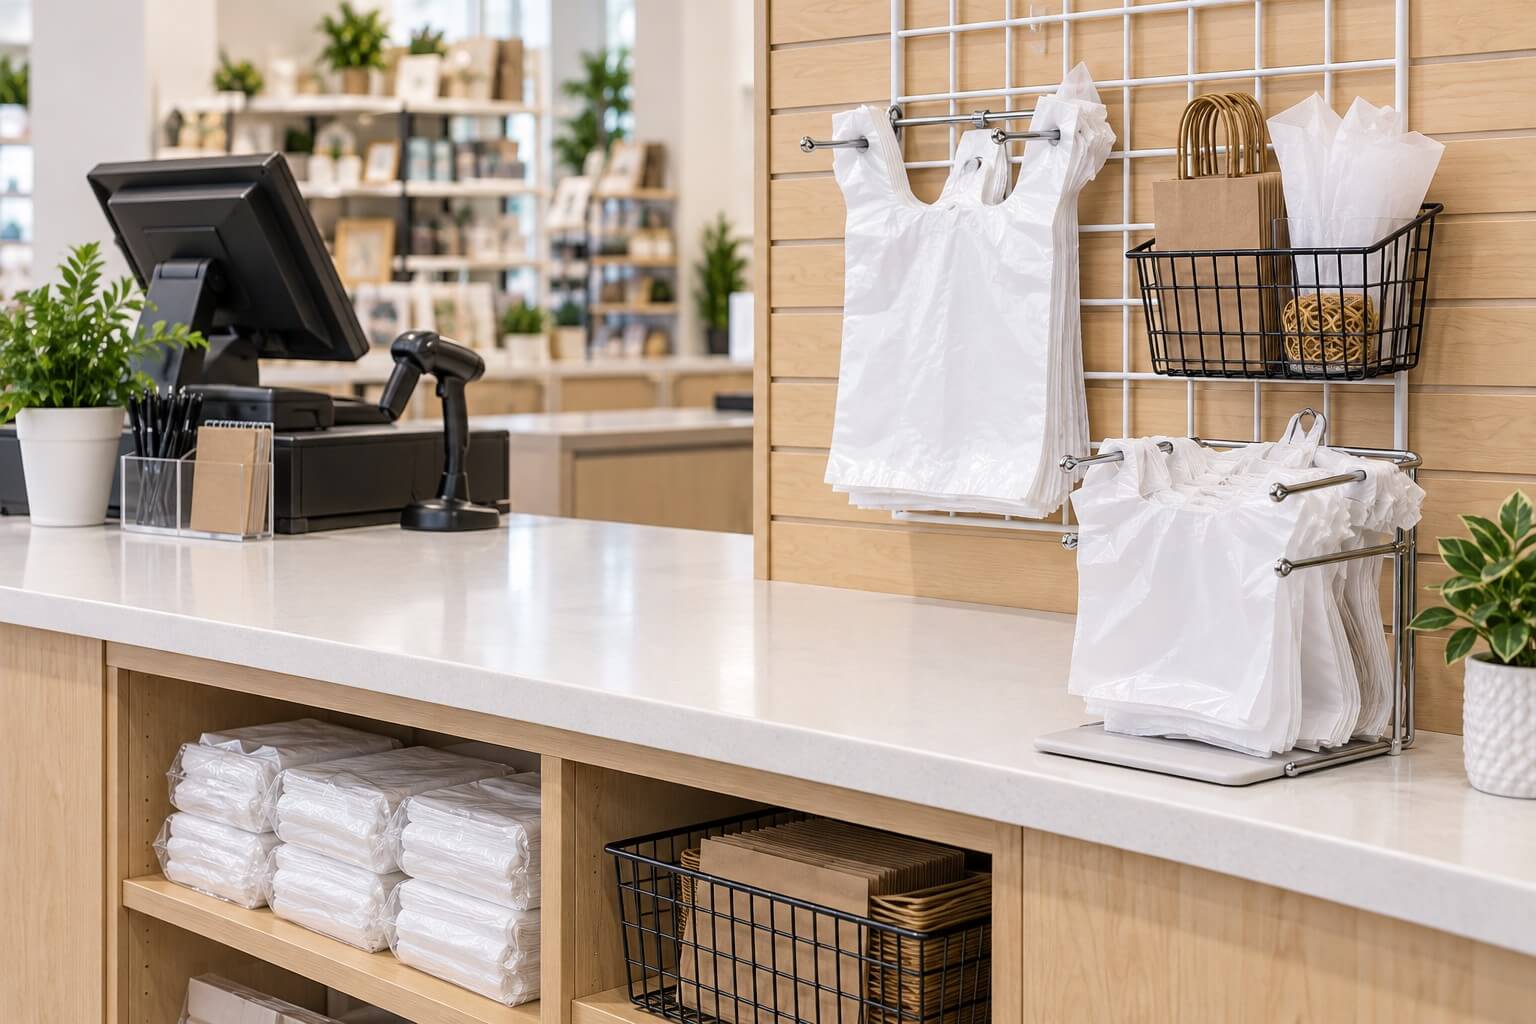
A bagging station is simply a defined spot in your checkout area where bags, tissue, and closures are stored for easy access. When everything has a home, cashiers stop hunting and start grabbing.
The benefits are practical:
- Faster checkout. One-handed bag access shaves seconds off every sale, and seconds add up during a rush.
- Cleaner counter. Organized stock means fewer loose bags cluttering the wrap area.
- Self-serve option. If customers can reach a bag holder themselves, you free up your hands to keep ringing.
- Better stock control. When bags sit in view, you notice when you are running low before you run out.
How to Set Up a Bagging Station at a Retail Counter
Start with the counter itself. Your register stand or service counter is the anchor for the whole setup. A piece like the Metal Framed Well-Top Register Stand gives you rear storage shelves for backup bag stock, so overflow cases stay off the floor and out of the way. If you need more room to spread out, a full-length option like a full-length service counter gives you a larger packing surface plus storage underneath.
Once you have your surface, plan the workflow left to right (or the direction your line moves). A simple order that works for most stores:
- Landing zone: clear space where the customer sets down merchandise.
- Ring zone: your register or scanner.
- Pack zone: bags, tissue, and closures, positioned last so bagging happens as items clear the register.
Keep the pack zone on the side where the customer exits. That way the flow feels natural and nobody reaches back across the counter.
Position Bag Stock for One-Handed Grabbing
This is the detail most stores miss. If a cashier needs two hands to separate a bag from the stack, you have already lost time. A few adjustments make bags come away one at a time:
- Stand plastic bags upright, not flat. T-shirt style bags hang best from a Plastic Bag Holder or wall hook so the top opens toward the cashier.
- Angle paper bag stacks toward the packer. A slight tilt lets fingers slide under the top bag.
- Keep the most-used size closest. Whatever bag handles 80 percent of your sales goes in the prime spot right at hand height.
- Face the open end out. Load bags so the mouth of the bag points at the person packing, not at the wall.
In my time helping small shops set up their counters, the single fix that made the biggest difference was simply flipping the bag stack so the opening faced the cashier. Sounds small, but it saves you from fumbling each and every transaction.
Bag Holders and Dispensers That Keep the Station Organized
You do not need a fancy fixture to organize a register packing area. Grid Wall and Slatwall hardware you may already own works well. The goal is to get bags off the flat counter and into a defined, reachable holder.
Wire Grid for Vertical Bag Storage
If you mount a small grid panel near the register, you can hang T-shirt bags and clip on baskets for smaller stock. A mini wire grid basket holds resealable bags, tissue, or ribbon so those items stay corralled instead of drifting across the counter. Grid keeps everything vertical, which frees up flat space for the customer's merchandise.
Baskets and Bins for Loose Items
Closures and small extras belong in bins, not loose. A dish of rubber bands and a stack of small bags for jewelry or candy keep the checkout tidy. When each item has a container, restocking becomes a glance rather than a search.
Match the Bag to the Purchase
A good station keeps a few sizes ready so cashiers grab the right bag the first time. Stock a range so nothing gets forced into a bag that is too small or swallowed by one that is too big:
- Small items (jewelry, accessories, single pieces): keep resealable or small merchandise bags in a bin.
- Everyday purchases: a large thank you T-shirt bag handles multiple pieces of apparel and larger items with ease.
- Gift and boutique sales: paper shoppers add a nicer presentation for special purchases.
You can browse the full range in the Retail Shopping Bags category to match sizes and styles to what you sell. Check each product page for exact bag dimensions and case counts so you order the right fit.
Making It Truly Self-Serve
Self-serve bagging works best when the setup is obvious to a first-time customer. If a shopper has to ask where the bags are, it is not self-serve yet.
A few things help customers pack their own purchases:
- Put one bag size within easy reach on the customer side. A single accessible holder invites people to grab and pack.
- Use a small sign. A short note like "Grab a bag here" removes any guesswork.
- Keep it stocked. An empty holder trains customers to stop trying. Refill before it runs dry.
- Leave open counter space beside it. People need room to set items down while they pack.
One bit of advice though, do not put your most expensive or fragile packaging in the self-serve spot. Reserve Gift Boxes and Kraft Paper Bags for cashier-assisted bagging, and keep the plain merchandise bags out front for customers to handle.
Restocking and Keeping the Rush Under Control
Even a great layout falls apart if you run out mid-rush. Set a par level for each bag size, meaning the minimum you want on hand before reordering. Keep a backup case on the register stand's rear shelf so a cashier can refill in seconds without leaving the counter.
Before a busy weekend, do a quick pre-open check: are all holders full, are closures stocked, and is the backup case within reach? Two minutes of prep time saves a scramble later.
The stores that keep their lines moving in July are usually the ones that treated bagging as its own station instead of an afterthought. Give your bags a home, face them toward the person packing, and keep a size for every sale within arm's reach. Do that, and your checkout keeps pace no matter how busy the day gets.
Written by Kris Boettigheimer
Purchasing Assistant
Kris brings over 32 years of retail industry experience and more than 20 years at Store Supply Warehouse to every article he writes for storesupply.com. Since joining SSW in 2005, Kris has worked across multiple departments , including six years in Sales/Customer Service, where he helped independent retailers and small business owners find the right store fixtures, retail displays, and merchandising supplies to improve their store layouts and drive sales. For the past 15+ years in SSW's Purchasing Department, he has collaborated with suppliers, tracked market trends, and sourced products across all three Store Supply divisions. Today, Kris channels that hands-on experience into content that helps retailers enhance store presentation, discover new display solutions, and make smarter product decisions.