
How to Use Body Forms to Display Halloween Costumes That Sell
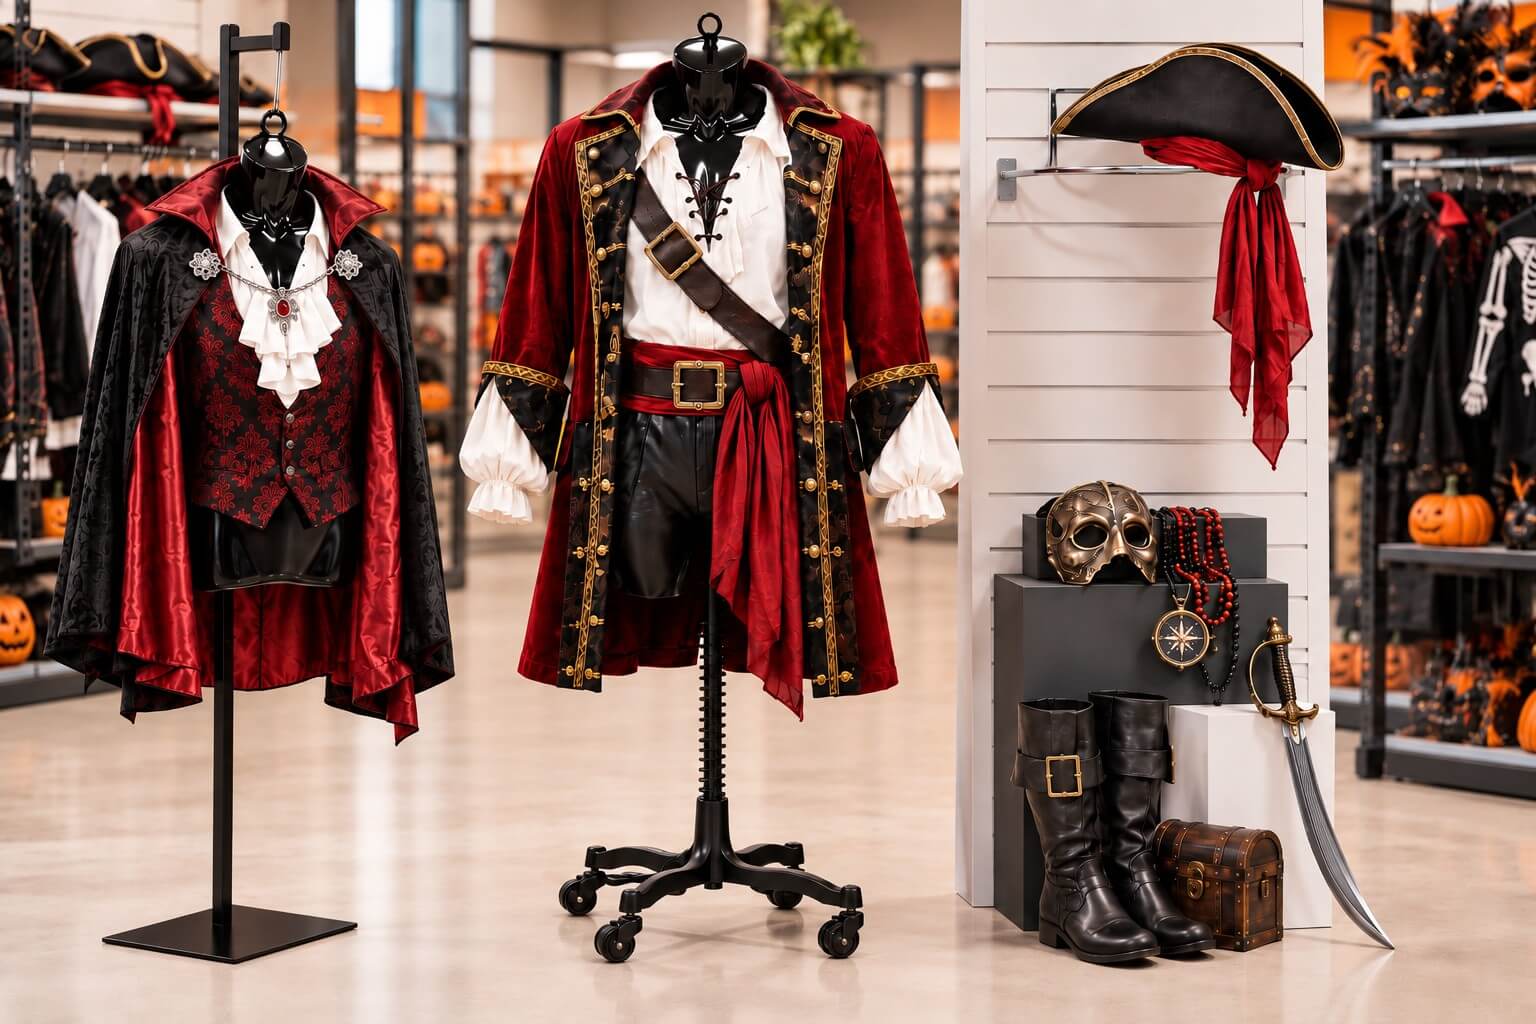
Halloween moves fast. Shoppers walk in with an idea in their head, and they buy from the store that helps them see the finished look first. A costume folded on a shelf or hung on a rack rarely does that. A dressed body form does.
In my years at Store Supply Warehouse, and before that on the sales floor, I’ve seen costume and seasonal shops turn a slow corner into a busy one by putting complete looks on display. This is a practical guide to doing exactly that: how to dress a body form for a full costume, where to place it, and how to accessorize so nothing looks half finished.
Why body forms sell costumes better than racks
A rack answers one question: what do we carry? A dressed form answers a better one: what will I look like? That second question is what closes the sale during Halloween season.
Body forms also solve a problem specific to costumes. Many Halloween pieces are layered, capes, tunics, sashes, belts, and a shopper needs to picture how those parts work together when they are separated on hooks. Show the layers assembled and you remove the guesswork.
One thing I always tell shop owners: you do not need a full realistic mannequin to make this work. A simple shirt form or dressmaker form does the job for most looks, and it costs less and takes up less space. You can browse options in our mannequins and body forms category to match your budget and floor plan.
How to dress a body form to show a complete Halloween costume
The goal is a look a shopper can copy top to bottom. Build it in layers so each piece reads clearly.
Start with the base layer
Put the main garment on first: the robe, the tunic, the dress, the shirt. Smooth it so the fabric hangs clean. Wrinkled costume fabric reads as cheap, even when the product is good. Use a Steamer or shake out folds before the form goes on the floor.
An economy male shirt form works well for tops, jackets, and shirt-based costumes. Its shiny finish helps the garment stand out, and the flexible form lets you adjust how the piece sits.
Add the layers that make it a costume
This is the step most shops skip. Add the cape, the vest, the sash, the armor piece, whatever turns a plain garment into a character. Layer from the inside out so each piece stays visible. A vest goes over a shirt, a cape goes over both, and a belt sits on top to hold the shape.
Pin or tuck loose fabric at the back of the form so the front stays crisp. Shoppers only see the front, so let the back do the hidden work of holding everything in place.
Finish the silhouette
Step back and check the outline. A good costume display has a shape you can recognize from across the room: a flowing princess silhouette, a boxy superhero, a caped villain. If the form just looks like a shirt on a stand, keep layering until the character shows.
How to accessorize so the whole costume looks finished
Accessories are where a display goes from "clothing" to "costume." They also drive add-on sales, which matter a lot during a short season.
- Head and face: a hat, hood, mask, or wig gives the character its identity. A sailor hat or pirate bandana instantly tells the story.
- Hands and props: a sword, staff, or basket. Prop these against the base of the form or secure them so they stay put.
- Jewelry and trim: beads, chains, or costume rings add detail. Small pieces like these display well on nearby risers so shoppers can grab them too.
- Footwear: even a suggested boot or shoe at the base completes the head-to-toe look.
A trick I picked up on the sales floor: keep the accessories used on the form in stock right next to the display. When a shopper falls for the complete look, the fastest way to lose the sale is to make them hunt for the hat you used. Place backups within arm's reach.
Hats are one of the easiest accessories to feature, and they carry a lot of a costume's character. A single hat display mounted near your form lets you show the same style the form is wearing, so shoppers connect the pieces without help.
How to position body forms to draw shoppers to your Halloween section
A great display in the wrong spot does not earn its keep. Placement is half the work.
Put forms at the entrance and sightlines
Set at least one dressed form where shoppers see it as they walk in or turn a corner. That first look is what pulls them toward the Halloween section instead of past it. Angle the form slightly so it faces the main traffic path, not straight ahead.
Make forms mobile so you can test placement
The best spot is not always the one you guessed. A rolling base lets you move a form and watch where it draws the most attention, then commit. Our dressmaker form base with wheels is compatible with Store Supply Warehouse dressmaker forms and makes it easy to reposition a display during a busy month.
Group forms to tell a bigger story
Two or three forms together read as a scene, a family, a themed group, or a couples costume. Groupings hold attention longer than a single form and prompt shoppers to buy more than one look. Vary the heights and characters so the cluster has movement.
Add height, signage, and small details
Raise a form or its accessories on a riser to break up a flat display and guide the eye. A set of nesting display risers lets you lift masks, props, or jewelry to different levels so the whole display has depth instead of sitting in one plane.
Clear signage matters during a rushed season. Post the costume name, the price, and where to find the pieces. Shoppers who can answer their own questions buy faster and ask staff less, which helps when the store is packed.
Keep the display fresh through the season
Halloween is short, and a display that looked sharp on October first can look picked-over by mid-month. Check your forms daily. Restraighten fabric, replace any accessory a shopper walked off with, and swap in a new look once a costume sells out so you never advertise something you cannot sell.
The shops that do best treat the body form as a working salesperson, one that never takes a break and shows the complete look every time. Dress it well, place it where the traffic is, and keep the pieces it wears close at hand. Do that, and the form will earn back its cost long before October is over.
Written by Kris Boettigheimer
Purchasing Assistant
Kris brings over 32 years of retail industry experience and more than 20 years at Store Supply Warehouse to every article he writes for storesupply.com. Since joining SSW in 2005, Kris has worked across multiple departments , including six years in Sales/Customer Service, where he helped independent retailers and small business owners find the right store fixtures, retail displays, and merchandising supplies to improve their store layouts and drive sales. For the past 15+ years in SSW's Purchasing Department, he has collaborated with suppliers, tracked market trends, and sourced products across all three Store Supply divisions. Today, Kris channels that hands-on experience into content that helps retailers enhance store presentation, discover new display solutions, and make smarter product decisions.