
Using Size Labels and Dividers for a Summer Clearance Rack
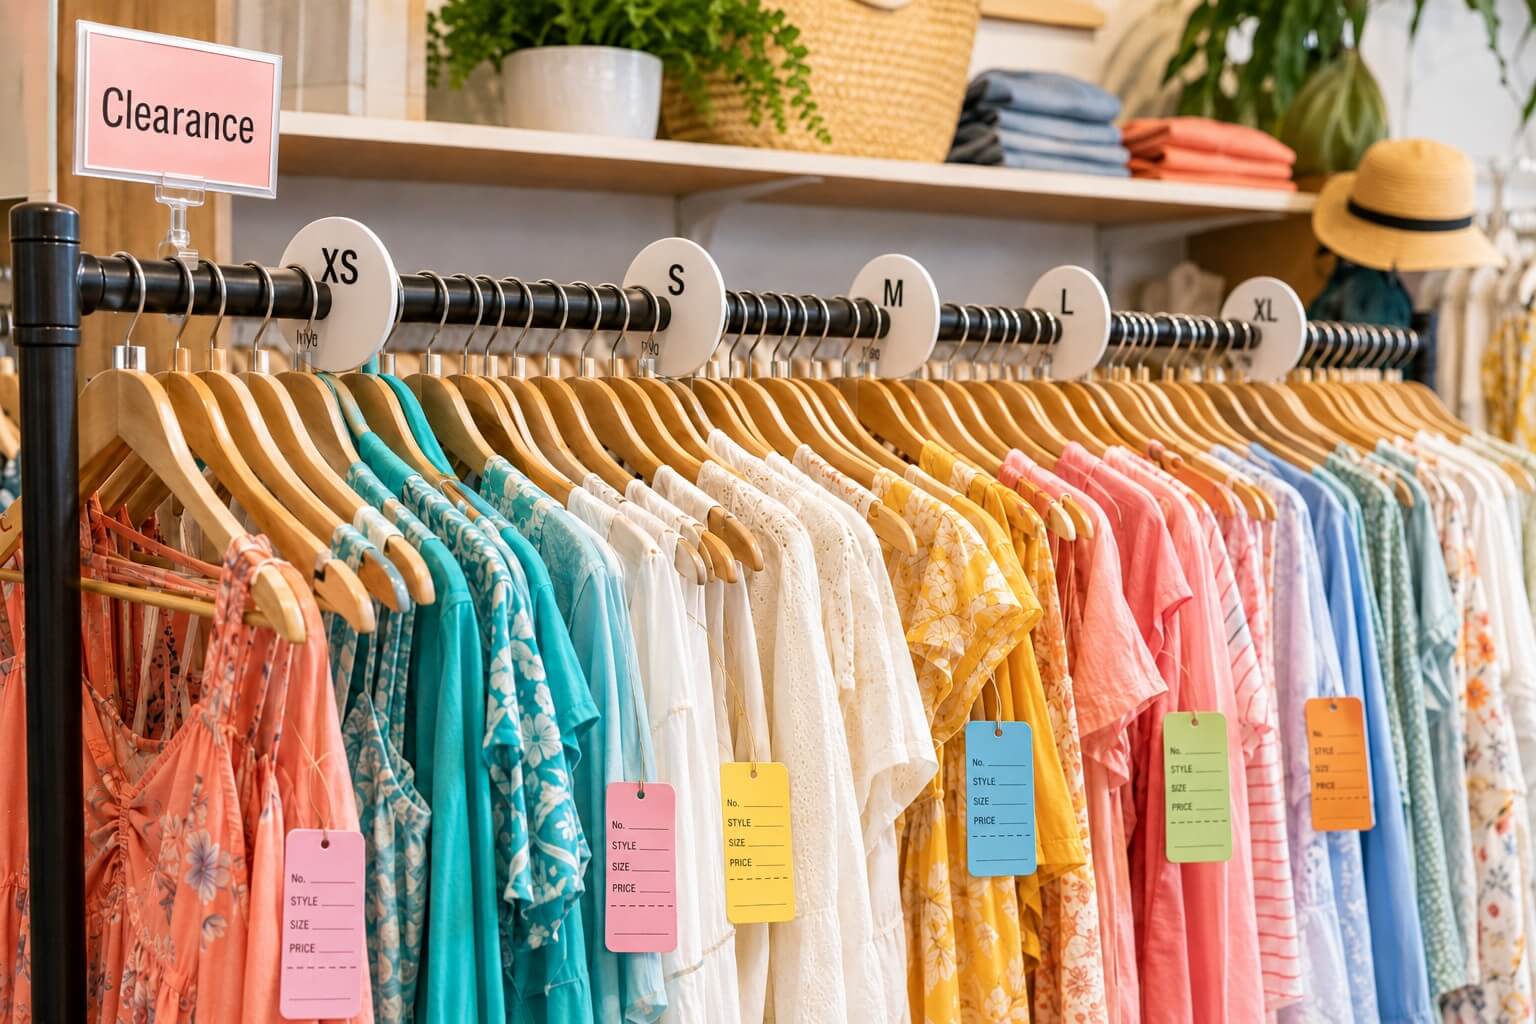
A clearance rack is a strange thing. It is where you want to move product fast, but it is often the messiest, most confusing rack in the store. Shoppers dig, get frustrated, and walk away without buying, even when the deals are good.
In my years helping independent shop owners, the clearance rack was always the first place I looked when a store owner said "traffic is great but sales are slow." An overcrowded markdown rack that no one can shop is just money sitting still.
The good news is that the fix is not complicated. With size dividers, color-coded price tags, and clear labeling, you can turn a picked-over summer rack into something shoppers can easily navigate on their own.
Why a Crowded Summer Rack Loses Sales
By mid-summer, your clearance rack has been shopped hard. The sizes are scrambled, the price stickers are a mix of markdowns, and the whole thing looks like an unkempt pile more than a display.
Here is what happens in the shopper's head: if they cannot find their size in a few seconds, they naturally assume it’s not there. And if they can’t tell what the price is, they’ll assume it’s more than they’ll want to pay. Either way, they move on.
Size dividers and clear tags remove both of these roadblocks. They let the customer answer two questions fast: "Is my size here?" and "What does it cost?" When those answers are easy found, people will buy.
How to Set Up Size Dividers on a Clearance Rack
Size Dividers are a low-cost way to let customers see where their size sits on the rack without pulling every garment. They keep merchandise organized and cut down on any reorganizing you have to do at closing.
Here is the setup I recommend for a summer markdown rack:
- Sort the whole rack by size first. Do not skip this. Dividers only help if the garments behind them actually match the marker.
- Place a divider at the front of each size group. Small, then medium, then large, and so on, moving in one clear direction.
- Face the printed size toward the aisle. The shopper should read the size while standing where they walk, not while bending over the rack.
- Leave a little breathing room between groups. A packed rack with no gaps hides the dividers. Even a small space signals a new section.
At Store Supply Warehouse you have a couple of styles to choose from. Hangrail dividers slide onto the rail and sit flush with your hangers, which works well on standard round and straight racks. Round size dividers for hangrails are a common choice for exactly this reason. If you want a marker that stays with the garment, Slip On Hanger Size Markers sit on the hanger hook itself and move with the item.
Where Should Size Dividers Sit on a Packed Rack?
On a tight, overloaded rack, position matters more than usual. Set each divider at the leading edge of its size group, on the side the customer walks up to. If the rack is a round, that means the divider should face outward from the center so it is readable as someone circles it.
One mistake I see often: owners bury the divider in the middle of a size run because that is where there happened to be space. The divider needs to mark the start of the group, not the middle. Front-of-group placement is what lets a shopper scan and skip instead of dig.
If your rack is so full that dividers disappear, that is a signal the rack is holding too much. Thin it out, or you can split the clearance across two racks. A slightly emptier rack that people can shop beats a jammed one they avoid.
How Color-Coded Price Tags Speed Up a Summer Markdown Sale
Color coding is the fastest way to communicate price on a busy rack without making the customer read fine print. You assign a color to a price or a discount level, then post a small sign that decodes it.
A common approach for summer clearance:
- One color per price point (for example, one color is $10, another is $5).
- Or one color per discount tier (one color is an extra 25 percent off, another is an extra 50 percent off).
The customer learns the code once from your sign, then reads the whole rack by color from across the aisle. That is the real speed gain. They do not have to inspect each tag, and your staff spends less time answering "how much is this?"
Post the color key where people can see it. A Fluorescent Star Burst Sign Card works well for this because the bright color pulls the eye and matches the energy of a sale. Our Retail Signs & Sign Holders section includes sign cards and holders you can use to display the key right at the rack.
In my experience, color coding pays off most during a multi-week summer clearance where prices drop over time. Instead of re-stickering the whole rack every week, you add a new color for the deeper markdown. Shoppers who come back a second time can understand the change at a glance.
Clear Price Labeling: Tools That Keep Tags Readable
Color tells the shopper roughly what a group costs. The actual number still needs to be clear and hard to swap. A Pricing Gun and labels give you clean, consistent price stickers quickly, which matters when you are marking down a full rack at once.
A few labeling habits that help on clearance:
- Keep the original ticket and add the markdown clearly. Customers like to see the drop from the old price. Just make sure the current price is the one that stands out.
- Use fasteners that fit your garments. Tagging fasteners attach hang tags to apparel fast, and hook fasteners let you hang tagged items on peg hooks if your clearance spills onto a wall.
- Restock the divider order at closing. A two-minute pass to re-sort by size at the end of the day keeps the rack shoppable the next morning.
You can find labels, guns, ink, and tags together in the Tagging, Labeling & Price Tags, which keeps your markdown supplies in one place when you are stocking up for the season.
Putting It Together for the Season
This set-up works because it does three simple questions at once. Size dividers answer "is my size here?" Color-coded tags answer "what does this cost?” and clear labeling confirms the exact price. When a shopper can answer all three questions without asking for help, they can move through the rack faster and ultimately buy more.
If you set your clearance rack up once at the start of your summer clearance, keep things sorted and add a new tag color each time you drop the price, the small amount of upkeep can separate a successful clearance rack from one that just sits there taking up space all summer long.