How to Set Up a Jewelry Display at a Craft Fair Booth
A craft fair puts you in front of a fast moving crowd. You have only a few seconds to catch someone's eye and a few more to hold it. A well planned booth does the work for you, so you can spend more time talking to shoppers instead of hunting for a piece that slid behind a box.
Start With the 10x10 Layout
Most craft fairs assign a 10 foot by 10 foot space. Before you think about a single riser, decide how shoppers will enter and move. Your goal is to pull people from the aisle and give them room to browse without blocking the flow.
Three common layouts work well for jewelry vendors:
- Open U-shape: Tables on three sides with an opening in front. Shoppers step inside and get surrounded by product. This one draws the most foot traffic because it feels like a small shop.
- L-shape: Tables on two sides. Good for a corner booth or when you want space for a second person or a chair.
- Straight line: One long table facing the aisle. Simple to set up, but you rely on your display height to stop traffic since people never step in.
In my years working with small sellers, the mistake I see most is packing every inch of table with product. A crowded table reads as clutter, not value. Leave breathing room around your best pieces so the eye knows where to land.
Build in Levels, Not Flat Fields
A flat table forces shoppers to look straight down, and they miss most of what you brought. Height brings jewelry up toward eye level and creates the visual interest that stops people mid-stride.
Set your tallest elements toward the back and step down toward the front. This gives every piece a clear sightline from the aisle.
Choose Portable Displays That Travel Well
The right fixture is the one that survives the trunk, sets up fast, and shows product cleanly. Weight, breakability, and setup time matter as much as looks when you are doing this every weekend.
Tiered Jewelry Risers
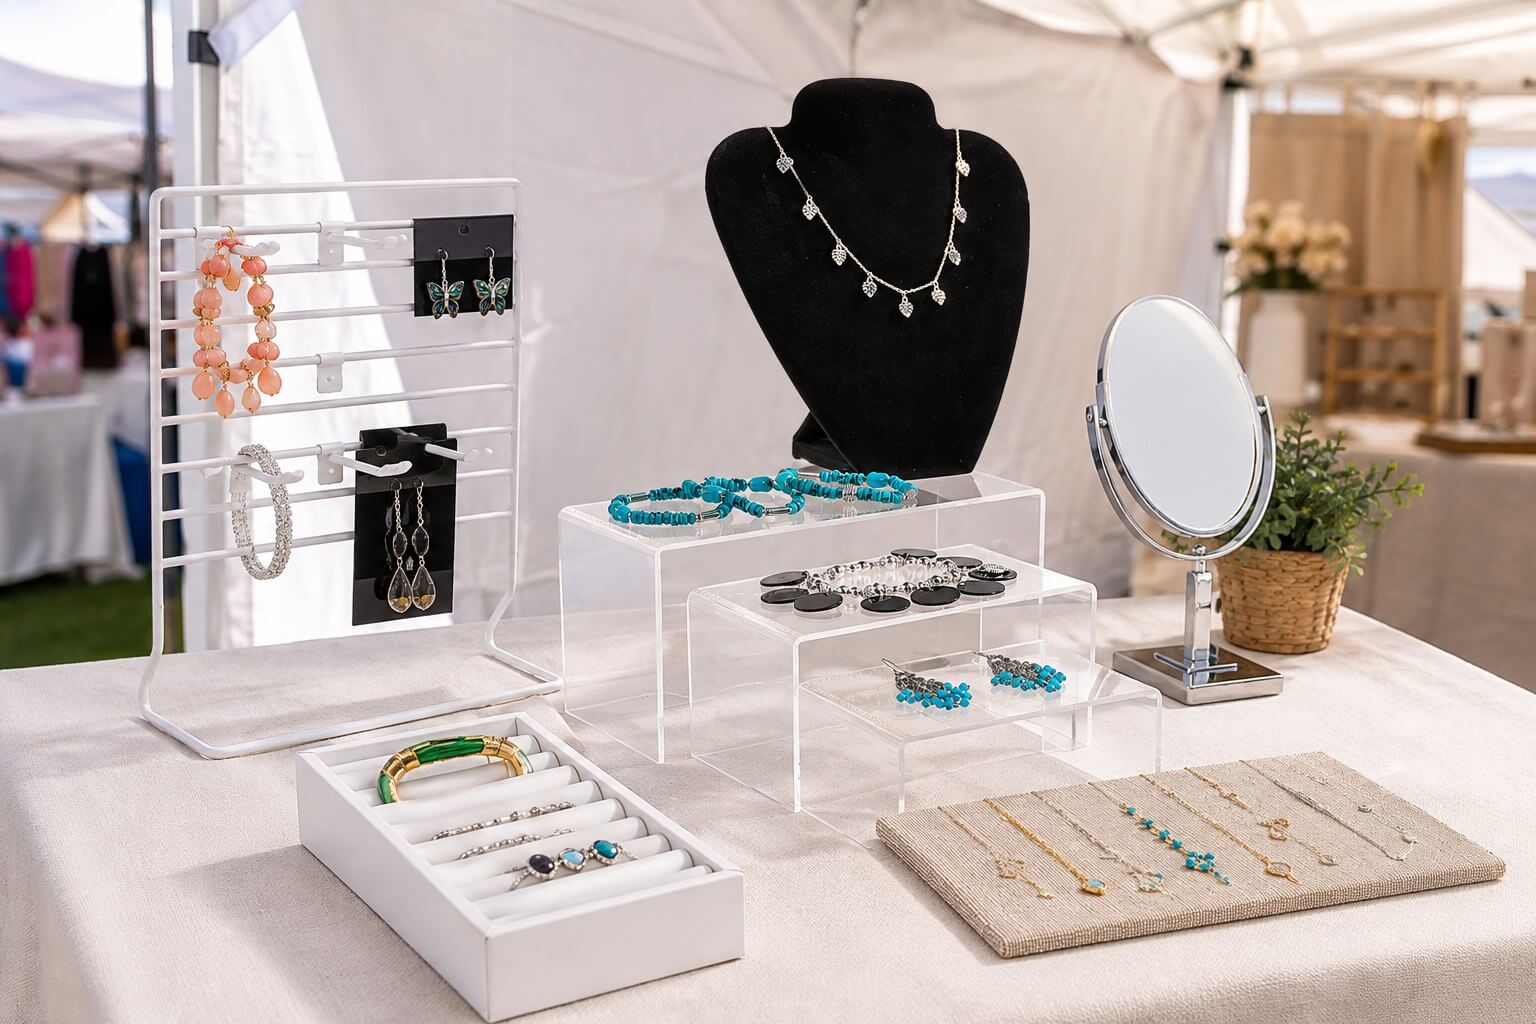
Risers do the heavy lifting for your levels. A set of nesting acrylic risers gives you three heights that store inside one another, so they take almost no room in your bin. Our rectangular nesting display risers come as a set of three and let you create lifts within a display by simply placing pieces on top. Clear acrylic disappears under the jewelry, which is exactly what you want.
Necklace Stands and Busts
Necklaces need to hang so the chain and pendant read the way they will be worn. A tall necklace display shows the full drop and keeps chains from tangling. Our tall slate faux suede necklace display stands 18 inches and is a lightweight, economical way to feature a single piece higher up where it draws the eye.
Pads, Trays, and Ring Inserts
For rings, earrings, and small pieces, organized inserts keep everything visible and quick to restock. A continuous slot ring insert holds a row of rings upright with 8 continuous sections, so a shopper can scan the whole line without picking through a random assortment. Flocked tray inserts and faux suede pad liners do the same job for bracelets and other pieces.
You can find these along with busts and boxes in the Jewelry Displays & Jewelry Stands category.
Arrange the Table for Traffic and Sales
Once your fixtures are chosen, the arrangement decides how many people stop. Here is the order I follow.
1. Put Your Draw Piece at the Corner
The front corner nearest the aisle is your billboard. Set your most eye-catching or colorful piece there, raised on a riser or bust. That is the piece meant to stop a walker, not necessarily your bestseller.
2. Group by Type, Then by Color
Keep necklaces together, rings together, earrings together. Within each group, run color from light to dark or in a rainbow. Grouping helps a shopper who wants earrings find them fast, and color order makes the whole table look intentional.
3. Leave a Clear Path to Price and Pay
Decide where you will stand and where the money changes hands before you unpack. Keep that corner open. A tangle at checkout costs you the next sale in line.
4. Sign It Simply
A shopper who has to ask the price of every piece often walks instead. Clear signage on price points and materials answers the quiet questions. Small burst cards work for a sale or a price band, and you can find them in the Retail Signs & Sign Holders category.
Draw Shoppers In From the Aisle
Foot traffic is the name of the game at a fair and just a few moves can reliably pull people off of the walkway.
- Height at the back: A tall element behind your table is visible from down the aisle before anyone reads a sign.
- Color that carries: One bold color, on a riser or a display card, reads from a distance better than a table of mixed neutrals.
- A mirror: Shoppers try on more when they can see themselves. A small 9 x 12 inch Acrylic Easel Countertop Mirror invites people to step in and linger.
- Motion and warmth: Stand at the front edge, not behind the table. A greeting from the aisle side does more than any fixture.
The other quiet driver is how you hand off a sale. Have a small Shopping Bag or Cotton Filled Jewelry Box ready so a purchase feels finished and gift ready. A tidy checkout also tells the next shopper you are a real business worth trusting.
Pack Smart So Setup Is Fast
The vendors who look calm at 8 a.m. are the ones who packed with a plan. A few habits save real time.
- Nest your risers and stack pads so one bin holds your display gear.
- Bag loose small items ahead of time. Resealable Clear Plastic Bags keep earrings and beads sorted and protected in transit, then double as inventory storage.
- Bring a table covering that reaches the floor. It hides your bins and gives you storage under the table.
- Pack a small kit: tape, zip ties, scissors, extra price cards, and a backup card reader battery.
Do one full dry run at home before your first show. Set the whole booth up in your garage or living room, time it, and photograph the layout you like. That photo becomes your setup map, and you will thank yourself when the doors open and the aisle fills.
The booth that sells is not the one with the most product. It is the one a shopper can read in three seconds from the aisle and shop comfortably once they step in. Build height, keep it grouped, leave room to breathe, and greet people from the front edge. Do that consistently and your craft show jewelry booth will earn its spot at the next fair.